How To Use The WVD QuickStart With an Empty Subscription
On this page, the process of using the WVD QuickStart with an empty Azure subscription is laid out from start to finish. If you don’t have an Azure subscription yet, you can start a 30-day free trial here. The QuickStart will configure Windows Virtual Desktop as well as Azure Active Directory Domain Services for you. All that is required is an empty Azure subscription as listed below, and after clicking one button, WVD will be ready for use within 2 hours. The video below shows a walkthrough of the entire deployment process.
Prerequisites
In order to successfully deploy a WVD environment with the QuickStart, the only prerequisites you will need are the following two:
- An active Azure subscription
- Sufficient administrator privileges on your subscription: you will need the owner role
Additionally, the QuickStart will set up Azure DevOps for you. This is not a prerequisite that requires action from you as the user, but it’s good to be aware of the fact that this particular service will be leveraged in this automation. Once you have all of these prerequisites satisfied, this video will show you a walkthrough of the QuickStart deployment outlined below.
Get started: ARM Deployment - Azure AD DS & Azure DevOps Setup
Once you’ve satisfied all the prerequisites, you are ready to deploy using the QuickStart! As explained in the Concepts section, the deployment consists of two main components: an Azure Resource Manager (ARM) deployment and an Azure DevOps (ADO) pipeline. The first of the two will deploy a number of resources supporting the deployment automation, including the creation of an Azure AD DS managed domain, to which the WVD virtual machines will be ‘domain-joined’, as well as an Azure DevOps project and automation pipeline. By clicking the “Deploy to Azure” button, you will be taken to the Azure Portal for a custom deployment. There, you can fill out the required user input and click purchase. It is recommended that you create a new resource group for the QuickStart to deploy in, as this will make it easier to delete its resources.
The above button will take you to the Azure Portal, where your screen should look like the image below. To understand what input is expected for all the listed parameters, the ‘i’ balloons to the left of every parameter will give you guidance.
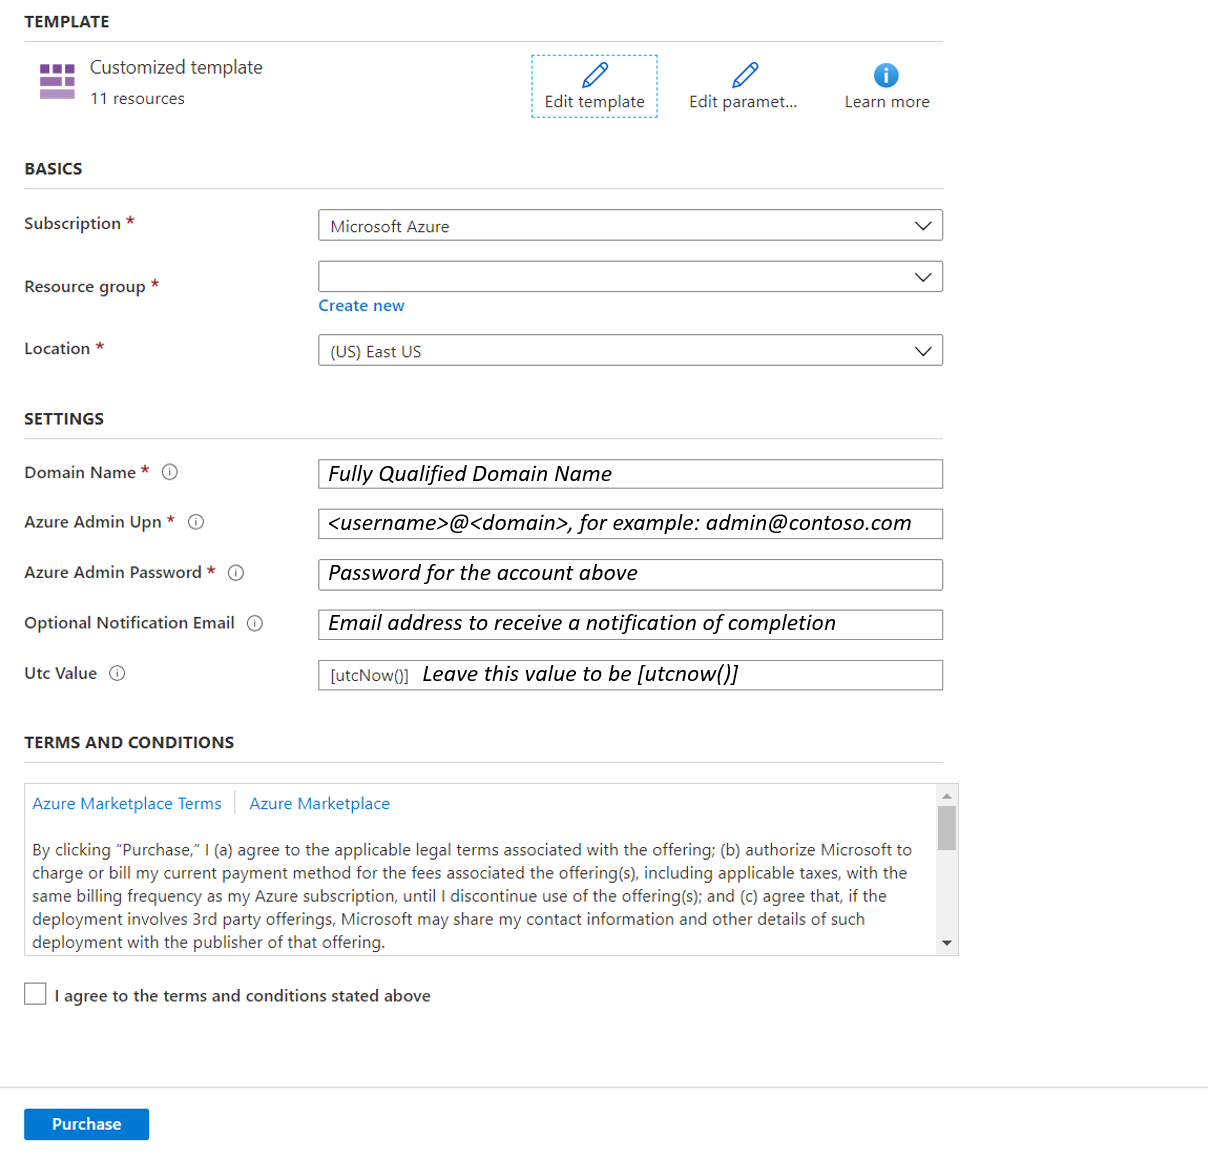
This deployment will deploy the resources outlined in the How it works section. The credentials you enter in the Portal will be securely stored as secrets in both an Azure keyvault and an Azure DevOps secret.
WVD Deployment: DevOps Pipeline
Once the ARM deployment completes, your WVD environment will automatically be deployed by an Azure DevOps pipeline. While no further action from you is required, you can follow along with this deployment, in Azure DevOps, where you will find the WVD QuickStart project. Navigate to the “pipelines” section - Here you’ll find a running pipeline that deploys a WVD environment (VMs, host pool, desktop app group, FSLogix configuration) for you. Upon completion of this pipeline, which will take about 20 minutes, your WVD environment is ready for use! You can also follow along with the deployment in the Azure Portal. Once the pipeline finished, you will receive an email from Azure DevOps (if you have supplied a notification email in the ARM deployment) informing you of its completion. Once you receive this email, your WVD environment is ready for use!
Withing Azure Devops, after clicking on your project and its pipeline, you will see something like this:
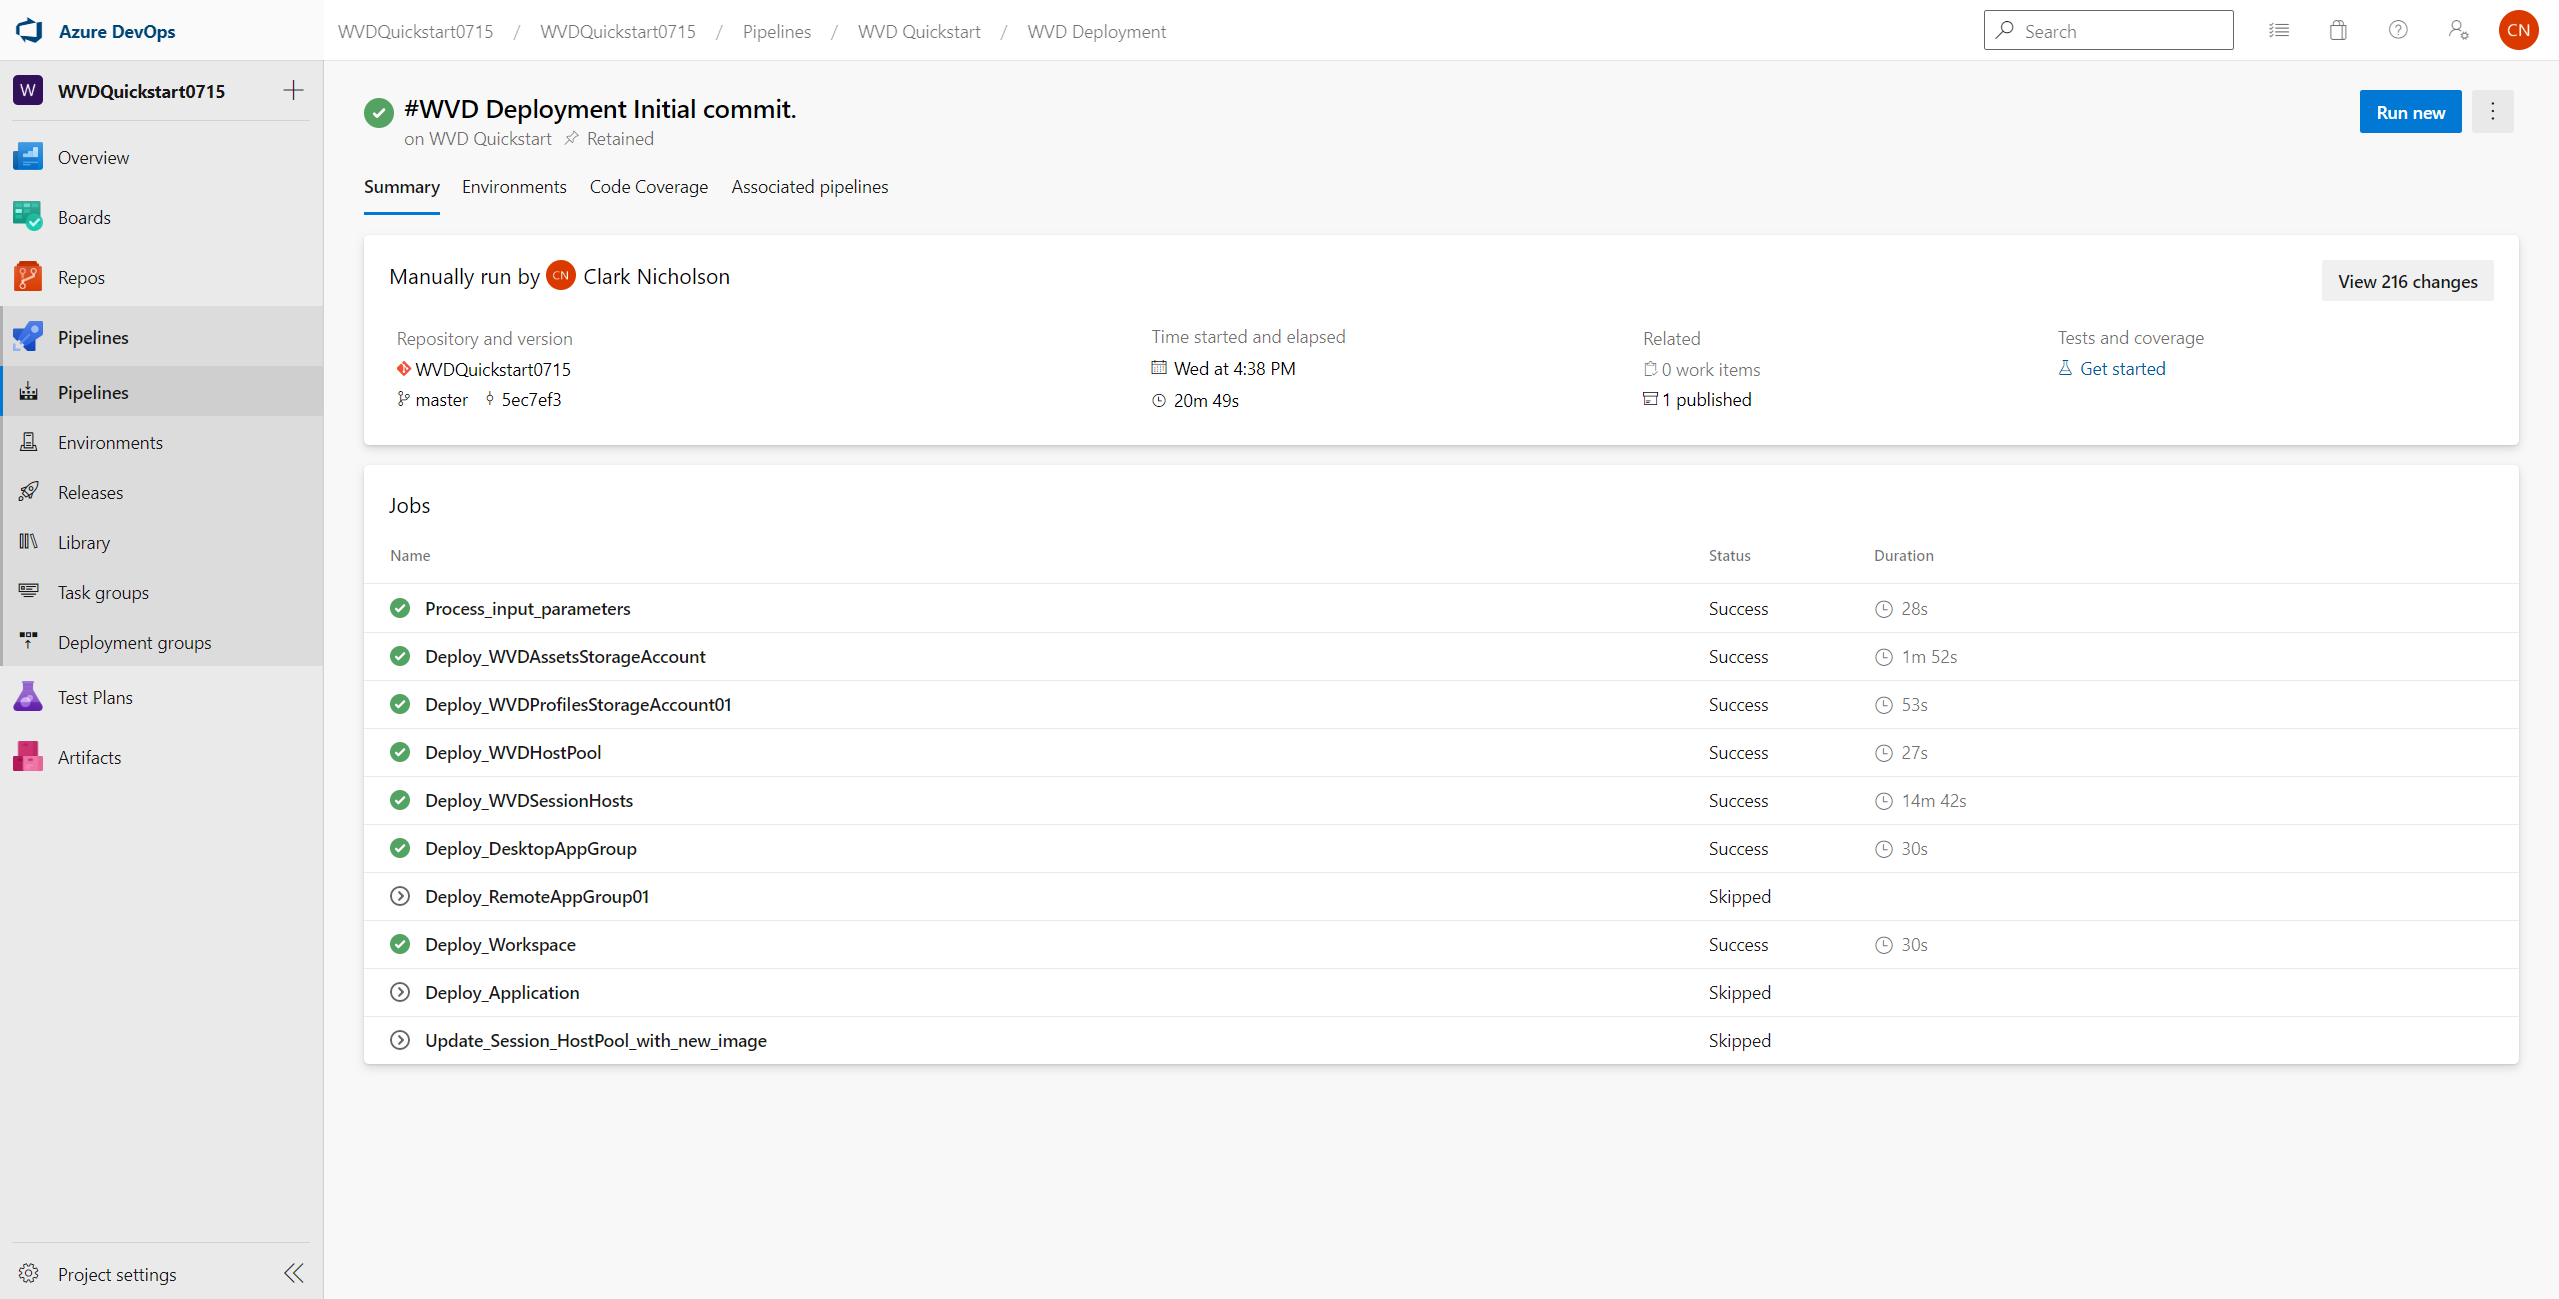
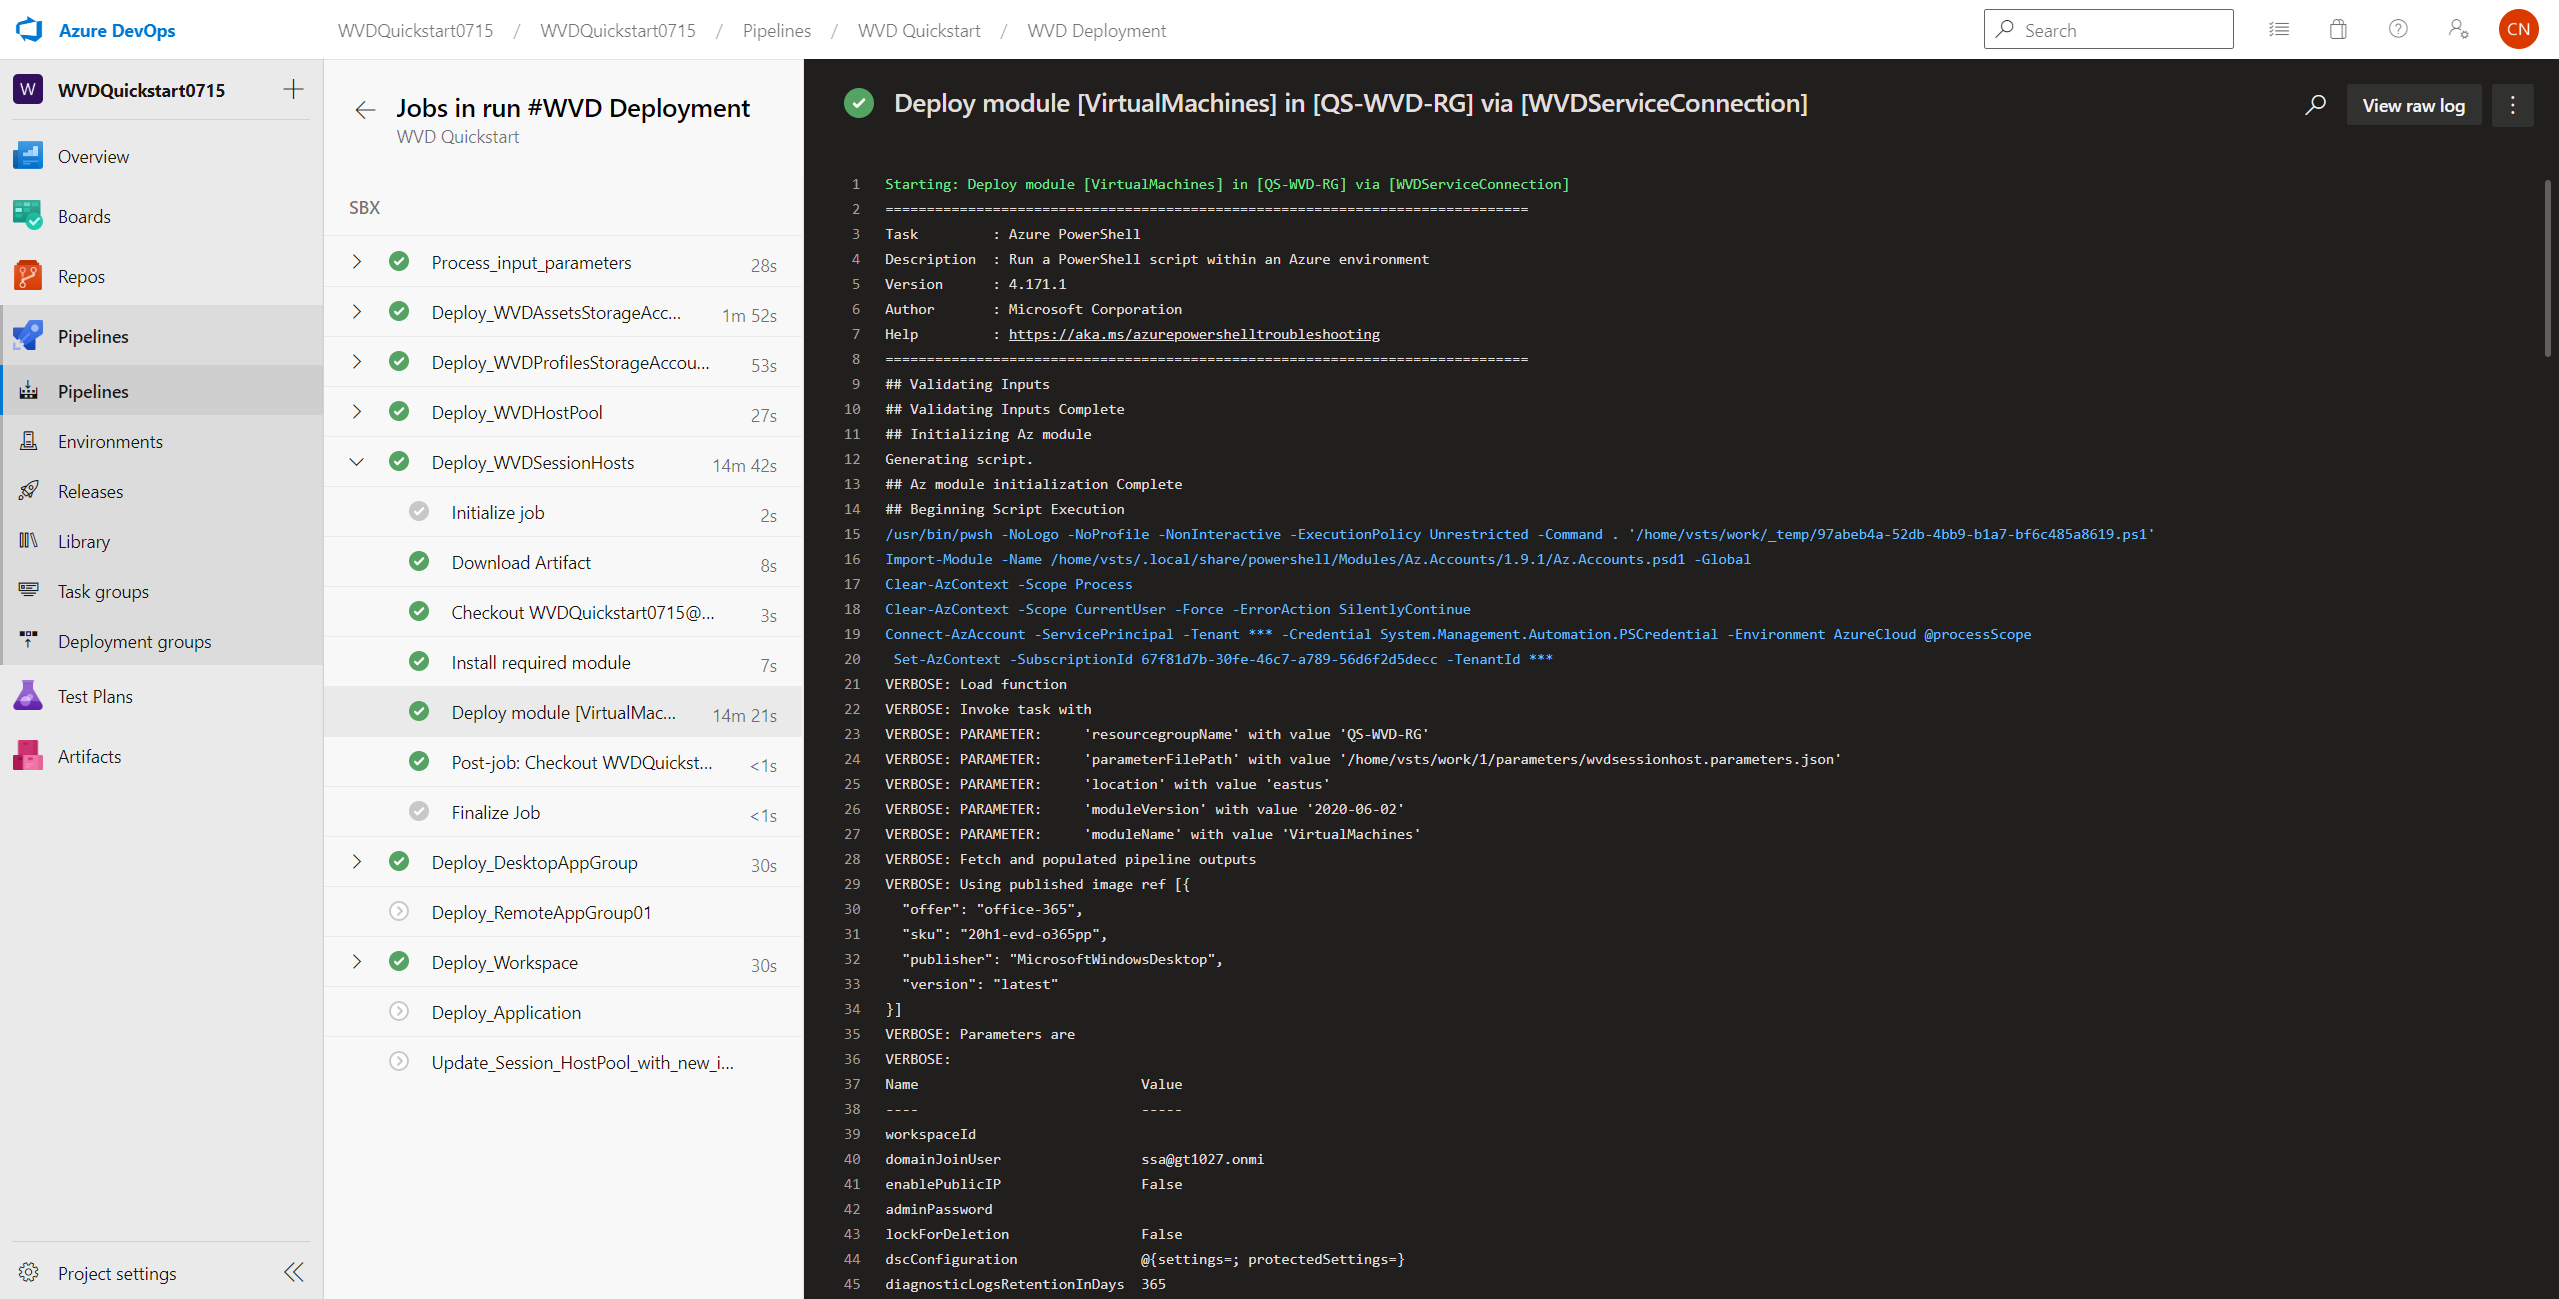
If you click on the pipeline’s jobs, you will be able to follow along with the deployment. This will give you a sense of the progress made so far in the deployment and it will also be the place where you’ll receive your error messaging, should the deployment fail.
Using Your New WVD Environment
The QuickStart creates a test user for you to try out the environment. Navigate to the WVD web client or install the WVD client locally (from here) and login with the following test user credentials:
Username: WVDTestUser001@{your-domain}.com
Password: Taken from DevOps organization in the following way: If organization is called “WVDQuickStartOrg120011Z”, your password will be “Org120011Z!” (case sensitive, and don’t forget the exclamation point at the end)
(Disclaimer: You should change this password at your earliest convenience.)
You should see a “WVD Workspace” appear, to which you can login to experience the best of Windows Virtual Desktop. Within this virtualized environment, your user will find Microsoft Office 365 and Microsoft Teams amongst other built-in Microsoft applications. Additionally, since the QuickStart configures FSLogix profile management for you, a user profile will be created. This will be stored in the profiles storage account, in the wvdprofiles file share.
Using the AADDS administrator account
In the automation, the QuickStart creates an administrator account (member of the AAD DC Administrators group) that can be used to manage the deployed domain. This is also the account used to domain join virtual machines, should you want to join additional VMs in the future. The credentials for this created account are the following, by default:
Username: domainJoiner@{your-domain}.com
Password: The same as your Azure admin account password (that you entered in the initial ARM deployment)
Deleting the WVD environment and the QuickStart resources
In case you want to delete your WVD environment and all the QuickStart resources from your Azure subscription, there’s a couple of steps to take. First, you can delete the resource group that the QuickStart was deployed in. This will delete your WVD environment and most of the QuickStart resources. Then, in the Azure portal,
- Go to Azure Active Directory –> App registrations and remove the “WVDServicePrincipal”
- Go to Azure Active Directory –> Groups and remove the “WVDTestUsers” group
- Go to Azure Active Directory –> Users and remove the “WVDTestUser001” user profile
- Navigate to Azure DevOps and delete the WVD QuickStart organization by going to the organization’s settings and scrolling to the bottom of the page.
Microsoft Support is not handling issues for any published tools in this repository. These tools are published as is with no implied support. However, we would like to welcome you to open issues using GitHub issues to collaborate and improve these tools. You can open an issue here.